Developers often consider using operational databases (e.g.PostgreSQL,MySQL) to perform search. However, search engines likeAlgolia are more efficient for the searching problem because they provide low-latency search querying/filtering and search-specific features such as ranking, typo tolerance, and more.
Once you have decided on a search engine, your next step is to inevitably answer:How do you send andcontinuously sync data to Algolia?
This is whereTurbine comes in. With Turbine, you can properly test, review, and build data integrations in a code-first way. Then, you can easily deploy your data application to Meroxa. No more fragile deployments, no more manual testing, no more surprise maintenance, just code.
Here is what a Turbine Application looks like:
const { updateIndex } = require('./algolia.js');
exports.App = class App {
sendToAlgolia(records) {
records.forEach(record => {
updateIndex(record);
});
return records;
}
async run(turbine) {
let source = await turbine.resources('postgresql');
let records = await source.records("User");
await turbine.process(records, this.sendToAlgolia, {
ALGOLIA_APP_ID: process.env.ALGOLIA_APP_ID,
ALGOLIA_API_KEY: process.env.ALGOLIA_API_KEY,
ALGOLIA_INDEX: process.env.ALGOLIA_INDEX,
});
}
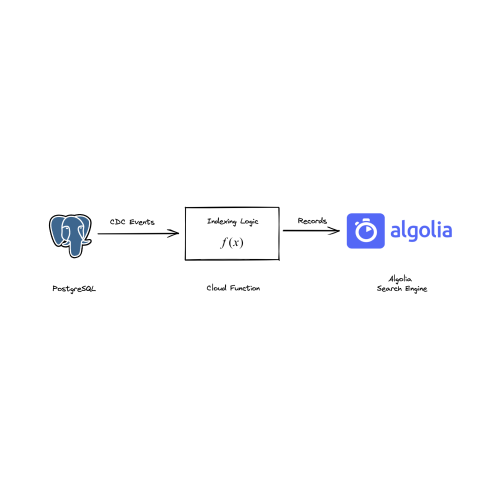
};In this article, we are going to create a data application to ingest and sync data from PostgreSQL to Algolia.
This application usesJavaScript, but Turbine also has Python, Go and Ruby libraries.
Here is a quick overview of the steps we will take to get started:
-
How it works?
-
Setup
-
Data Application
- Entrypoint
- Indexing to Algolia
- Secrets
-
Running
- Verifying
-
Deployment
-
What's next?
How it works?
A data application responds to events from your data infrastructure. You can learn more about the anatomy of a Javascript data application in thedocumentation.
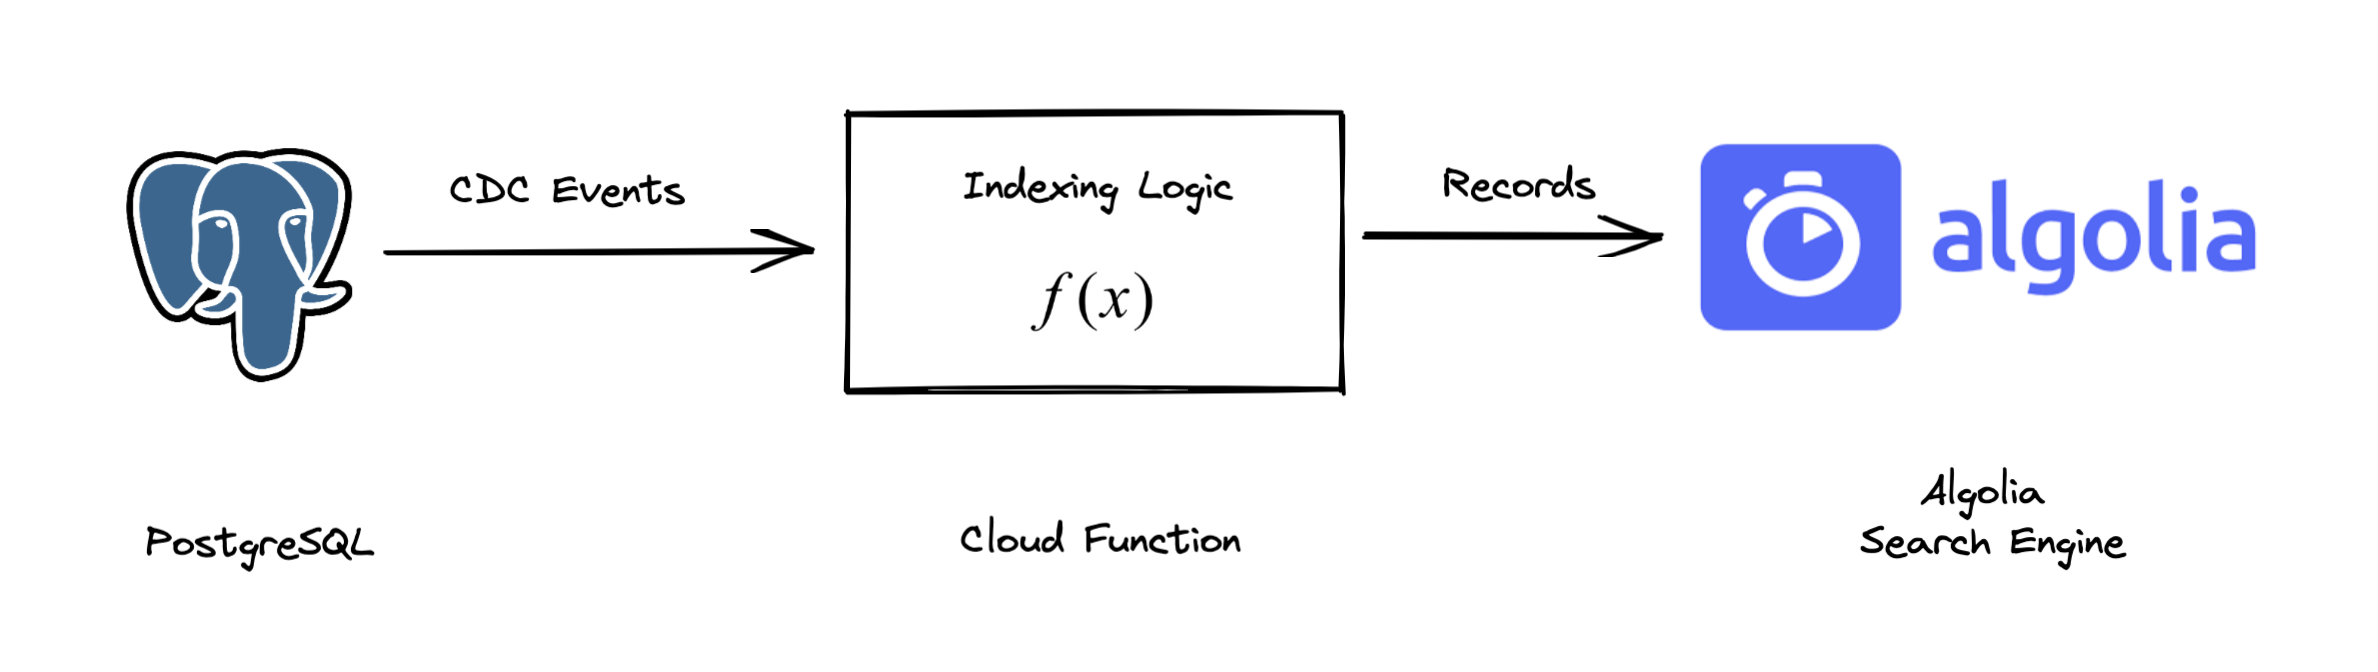
This data application will:
- Listen toCreate, Update, and Delete events from a Postgres database.
- Write the data to an Algolia index.
Setup
Before we begin, you need to setup a few things:
$ meroxa login$ git clone git@github.com:meroxa/turbine-js-examples.gitSince this example uses Javascript, you will need to haveNode.js installed.
- Copy the
search-indexing-algoliadirectory to your local machine:
$ cp -r ~/turbine-js-examples/search-indexing-algolia ~/- Install NPM dependencies:
$ cd search-indexing-algolia
$ npm install
Now we are ready to build.
Data Application
A data application responds to events from our data infrastructure. For example, as the customer interacts with PostgreSQL, we need to update the Algolia index.
You can learn more about the anatomy of a Javascript data application in thedocumentation.
Entrypoint
Withinindex.js we will create a data application that will listen to theUser table in PostgreSQL.
const { updateIndex } = require('./algolia.js');

exports.App = class App {
  sendToAlgolia(records) {
    records.forEach(record => {
      updateIndex(record);
    });
    return records;
  }

  async run(turbine) {

    let source = await turbine.resources('postgresql');

    let records = await source.records("User");

    await turbine.process(records, this.sendToAlgolia, {
      ALGOLIA_APP_ID: process.env.ALGOLIA_APP_ID,
      ALGOLIA_API_KEY: process.env.ALGOLIA_API_KEY,
      ALGOLIA_INDEX: process.env.ALGOLIA_INDEX,
    });

  }
};
Here is what the code does:
export.App - This is the entry point for your data application. It is responsible for identifying the upstream datastore, the upstream records, and the code to execute against the upstream records. This is the data pipeline logic (move data from here to there).
exports.SendToAlgolia - This is the function that is executed against the upstream records. It is responsible for indexing the records.
Indexing to Algolia
TheupdateIndex function is responsible updating the index in Algolia.
const algoliasearch = require('algoliasearch')

const client = algoliasearch('APPLICATION_ID', 'APPLICATION_KEY')
const index = client.initIndex('dev_users')

function updateIndex(record) {
    const { payload } = record.value
    const { before, after, op } = payload

    if (op === 'r' || op === 'c' || op === 'u') {
        console.log(`operation: ${op}, id: ${after.id}`)

        after.objectID = after.id
        index
            .saveObject(after)
            .then(() => {
                resolve(after)
                console.log(`saved ${after.id}`)
            })
            .catch((err) => {
                console.log(`error saving ${after.id}`)
                reject(err)
            })
    } else if (op === 'd') {
        console.log(`operation: d, id: ${before.id}`)
        index
            .deleteObject(before.id)
            .then(() => {
                console.log(`deleted ${before.id}`)
                resolve(before)
            })
            .catch((err) => {
                console.log(`error deleting ${before.id}`)
                reject(err)
            })
    }
}

// exports
module.exports = {
    updateIndex,
}
This method willsaveObject if the record was created, or updated. It willdeleteObject if the record was deleted. This allows Algolia to stay perfectly in sync with your data infrastructure.
Secrets
You will need to update the Algolia credentials.
Running
Next, you may run your data application locally:
$ meroxa app runTurbine usesfixtures to simulate your data infrastructure locally. This allows you to test without having to worry about the infrastructure. Fixtures are JSON-formatted data records you can develop against locally. To customize the fixtures for your application, you can find them in thefixtures directory.
Verifying
You can verify the success of your data application by verifying the data in your Algolia index specified in theupdateIndex function.
const client = algoliasearch('APPLICATION_ID', 'APPLICATION_KEY')
const index = client.initIndex('dev_users')
Deployment
After you test the behavior locally, you can deploy it to Meroxa.
Meroxa is the data platform to run and execute your Turbine apps. Meroxa takes care of maintaining the connection to your database and executing your application as changes. All you need to worry about is the data application itself.
Here is how you deploy:
- Add a PostgreSQL resource to your Meroxa environment:
$ meroxa resource create postgresql \
--type postgres \
--url postgres://$PG_USER:$PG_PASS@$PG_URL:$PG_PORT/$PG_DB- Deploy to Meroxa:
$ meroxa app deployNow, as changes are made to the upstream data infrastructure, your data application will be executed.
What's next?
In this guide, we have covered the basics of how to build a data application and deploy to Meroxa. This application will move data from your PostgreSQL database to your Algolia index.
Here are some additional resources:
- Real-time Data Lake Ingestion with Turbine
- Real-time eCommerce Order Data Warehousing and Alerting with Turbine
I can't wait to see what you build 🚀. If you have any questions or feedback:Join the Community


