
Today, we’re excited to announce Turbine support within Self-Hosted Environments. Software developers can now build and deploy Turbine data applications in Self Hosted Environments.
We know that with the need for data security and compliance becoming more critical, teams often have to choose between speed (time to deploy) or compliance (minimizing risk with sensitive data). Data isolation is a critical component of any data streaming application, as it helps to ensure the accuracy and reliability of data processing while also enhancing data security. At Meroxa, we've done the work to eliminate implementation complexity while still offering complete operational control over your data security, compliance, and performance needs.
Getting started with Environments
First, you'll need access to the Self-hosted Environments Beta to get started. Request access with the link below: Sign-up for the Self-hosted Environments Beta.
A member of our team will reach out with the next steps. You will need access to your cloud provider to generate credentials with the necessary permissions to provision an environment. For more information on how to set up your Environment, refer to our setup documentation.
Creating an Environment
You can provision a Self Hosted Environment through our dashboard in the Environments tab > Create Environment.
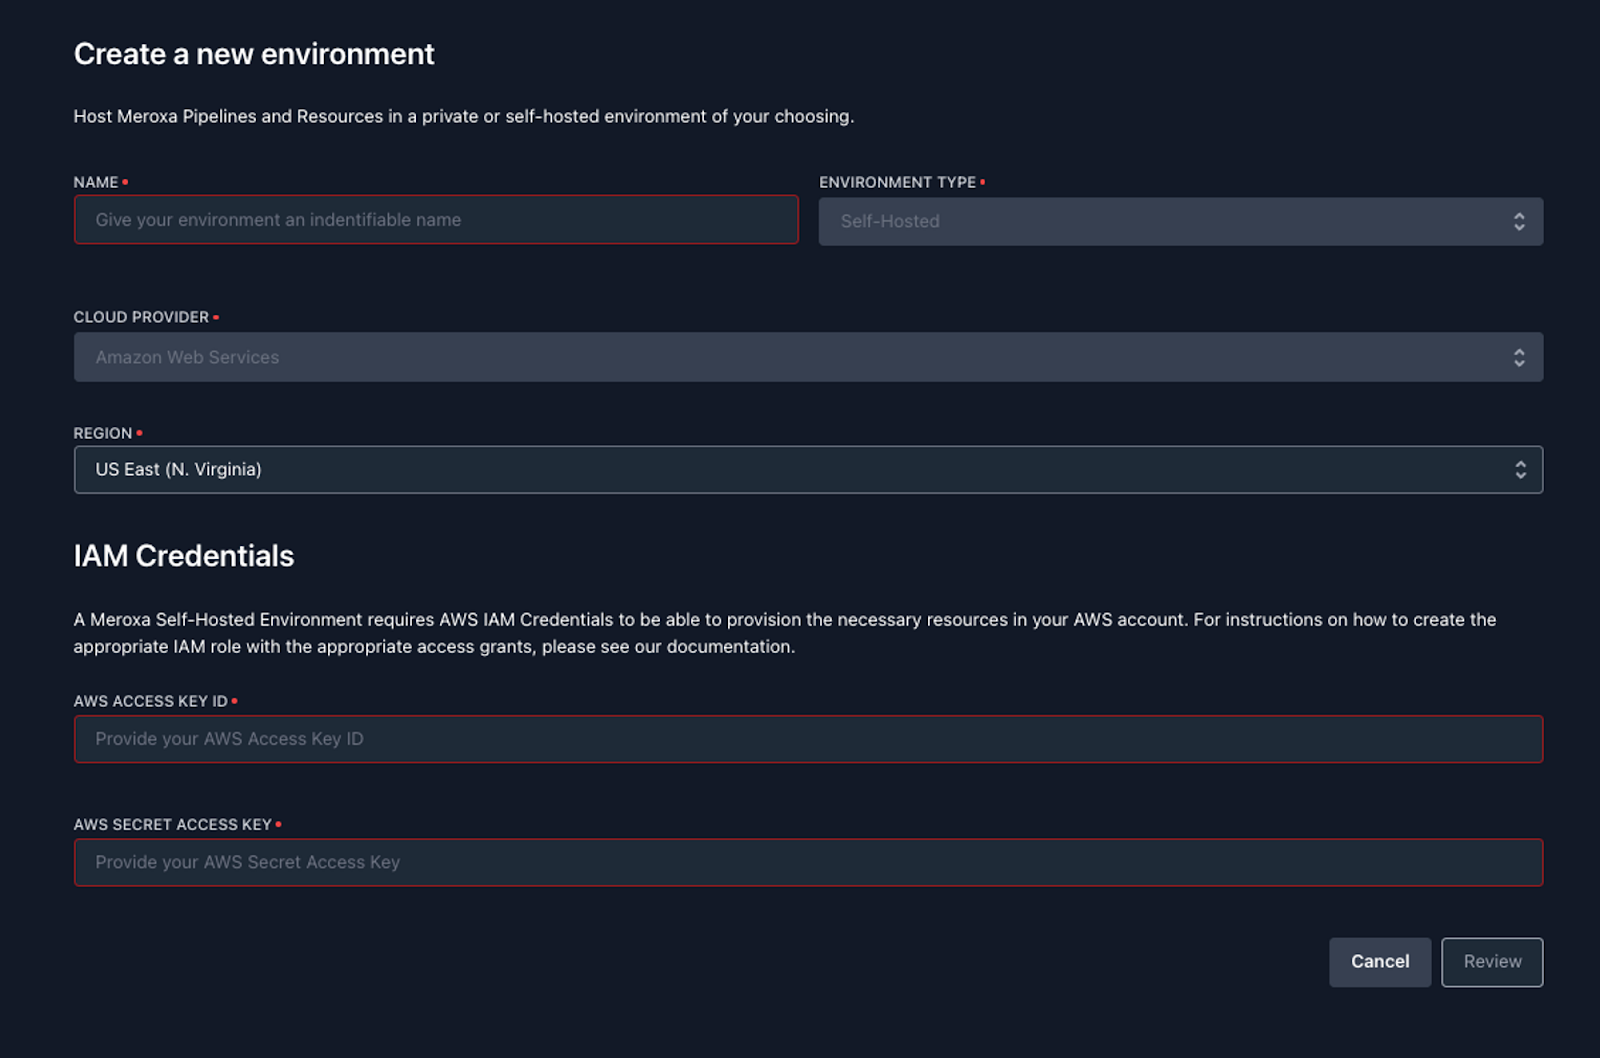
Or through our CLI. As part of the environment provisioning process, credentials from your cloud provider with the appropriate permissions are required.
$ meroxa env create my-env \
--type selfhosted \
--provider aws \
--config {"aws_access_key_id":"$AWS_ACCESS_ID", "aws_secret_access_key": "$AWS_SECRET_KEY" }
The Meroxa Platform will perform a preflight check to verify permissions before generating a new VPC and the associated dependencies in your cloud. A secure remote connection will be maintained automatically with the Meroxa platform for the control plane to ensure everything operates smoothly.
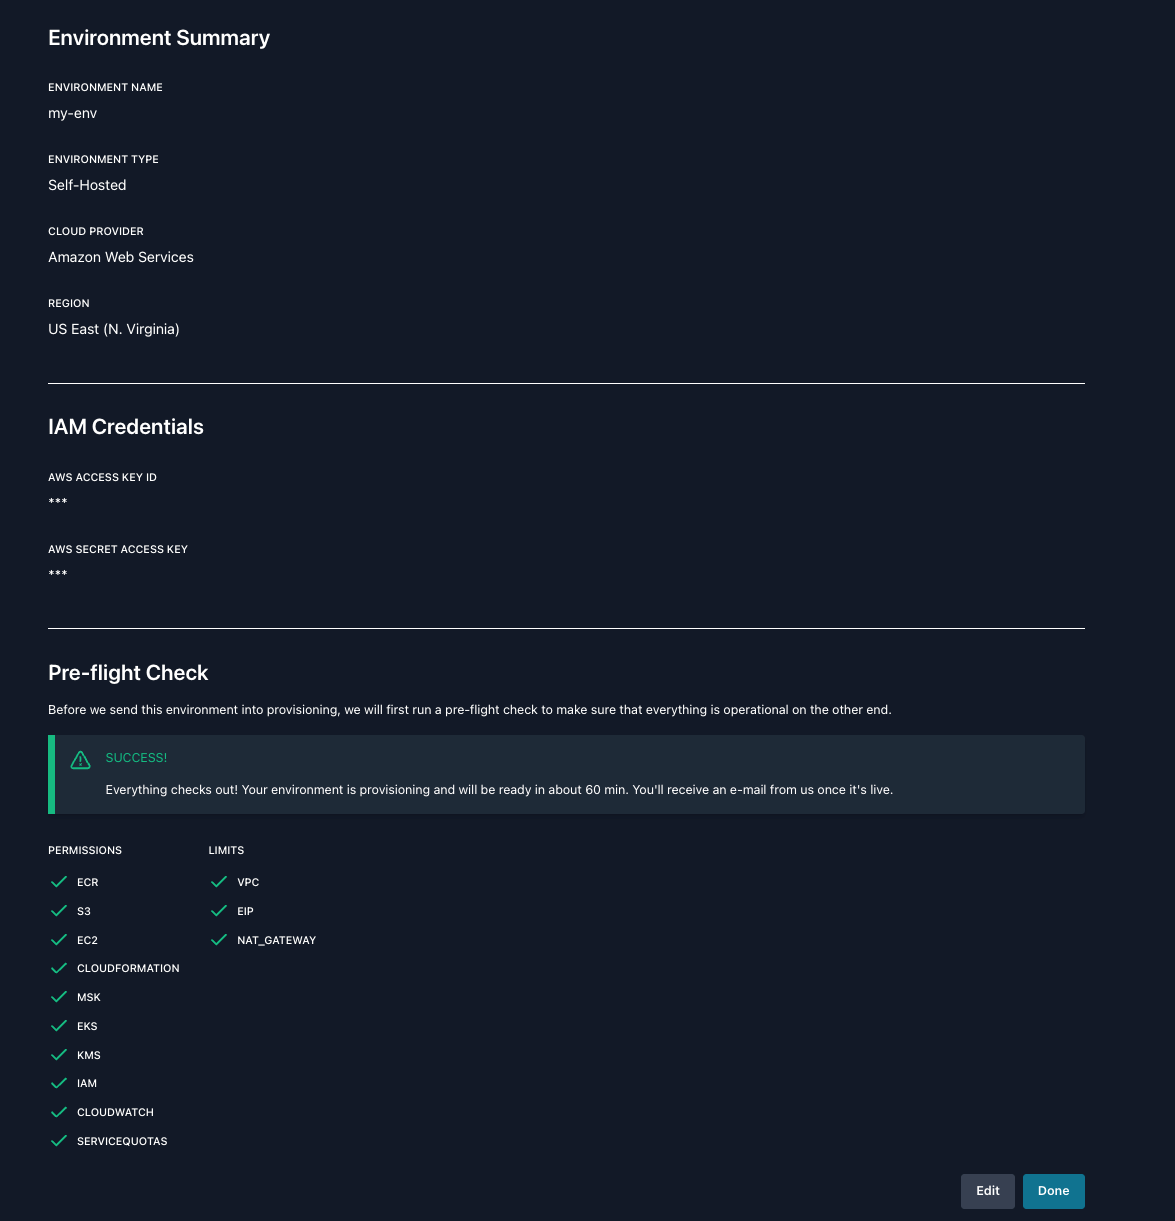
Once successfully provisioned, you are ready to start creating Resources and build Turbine apps within your Self-hosted Environment.
Create a resource
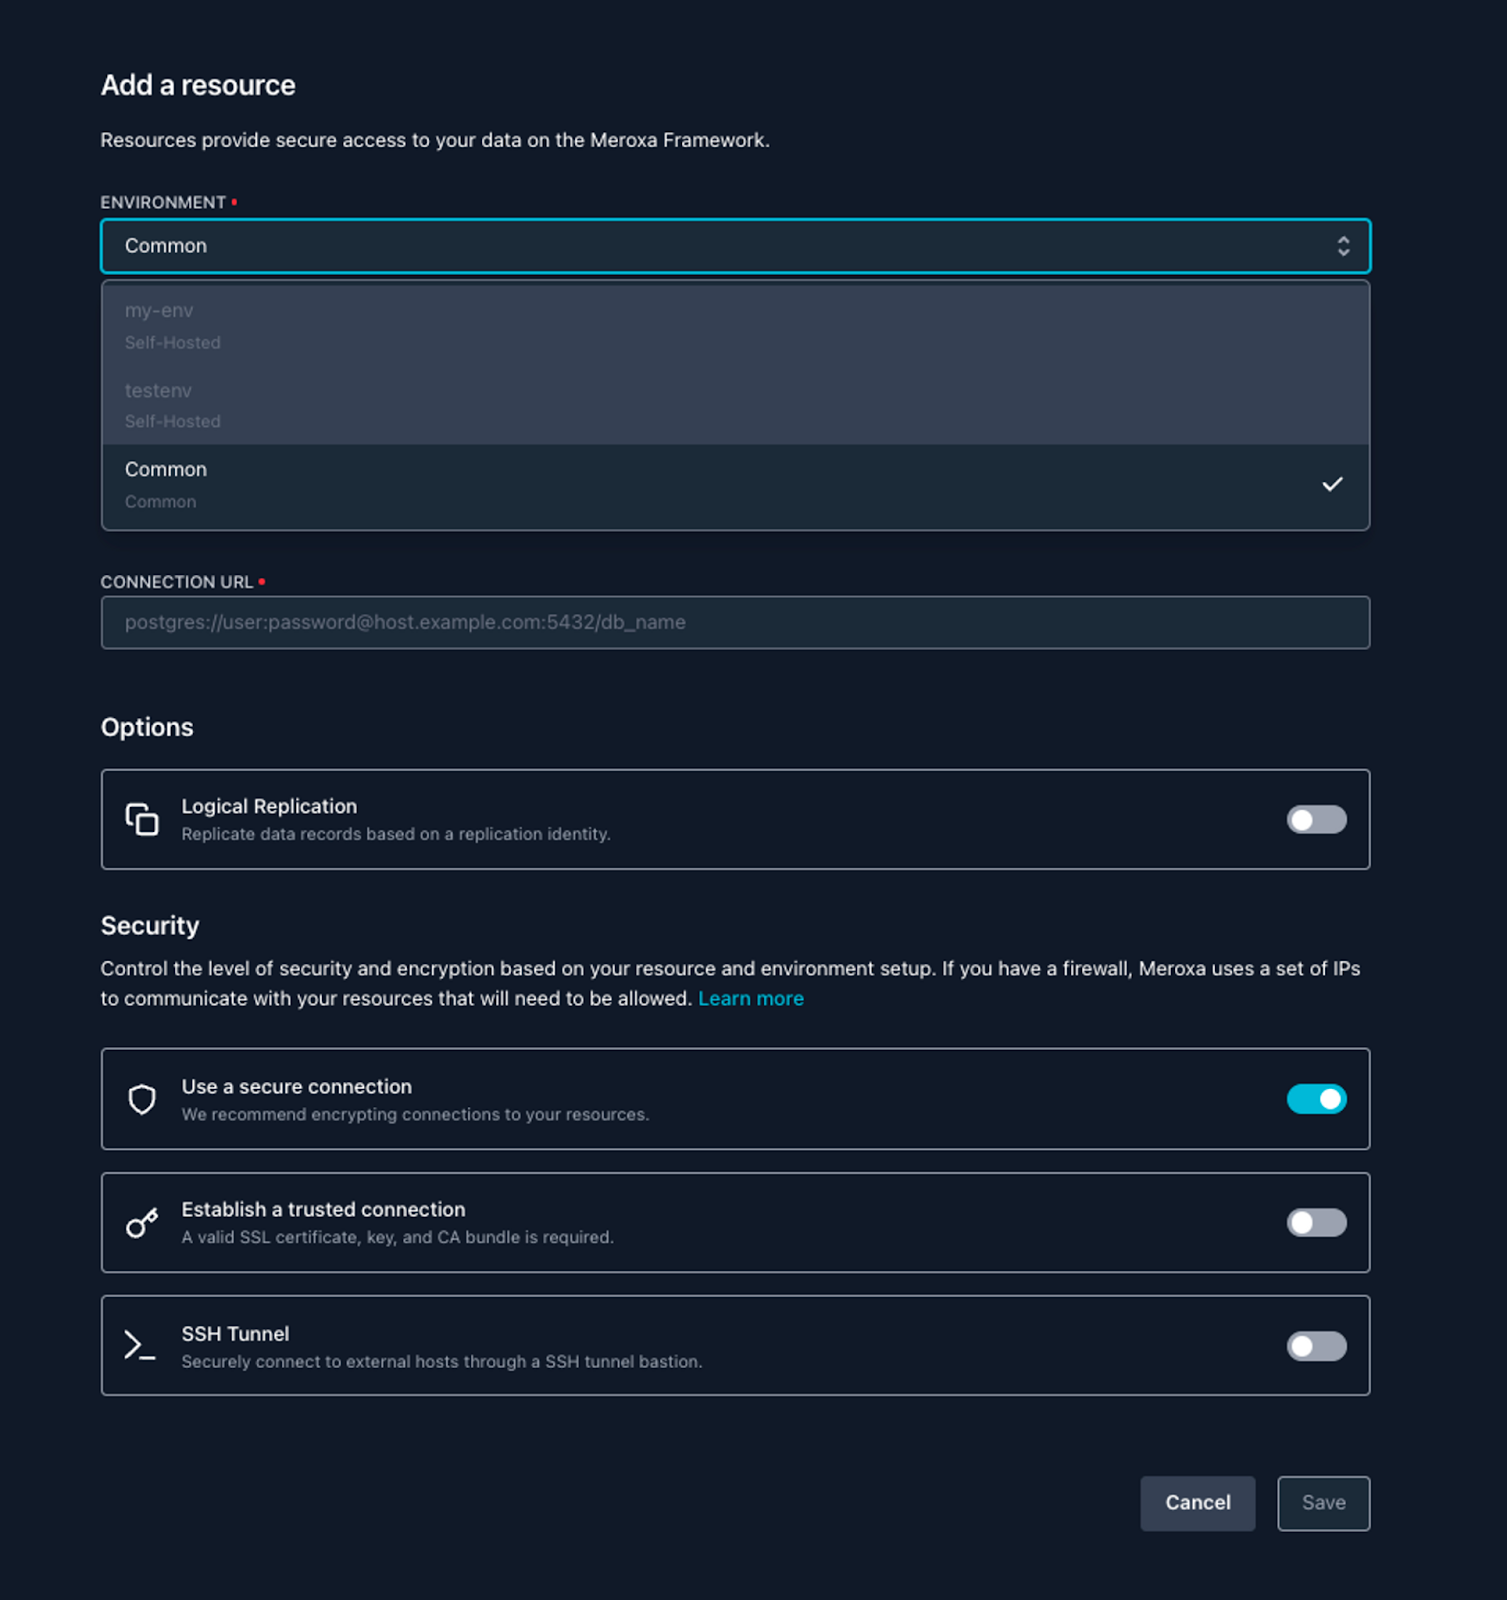
In order for a Turbine streaming application to securely connect with a data source or destination, one or more Meroxa Resources must be created. The resource must be added to the environment for it to be accessible. Resources created in the common environment will not be accessible in your environments.
You can add a Meroxa resource via the dashboard under Resources tab > Add Resource. Under the environment dropdown, select the environment to create the resource in.
You can also do this via our CLI.
# Create a resource

$ meroxa resource create my-postgres \
--type postgres
--env my-env
--url postgres://user:password@host.example.com:5432/db_name
Using the ‘env’ tag in the CLI allows you to indicate which environment to create them in. The default environment is common.
Once you’ve added your resources, you’re now ready to build your Turbine app! If you need help, check out our Quickstart Guide.
Building a Turbine streaming application
In the example below we will build a Turbine J application and deploy to our Environment. Other languages such as Python, Ruby, and Go are also supported. Initialize the streaming app within the local directory you are currently in by running the following command:
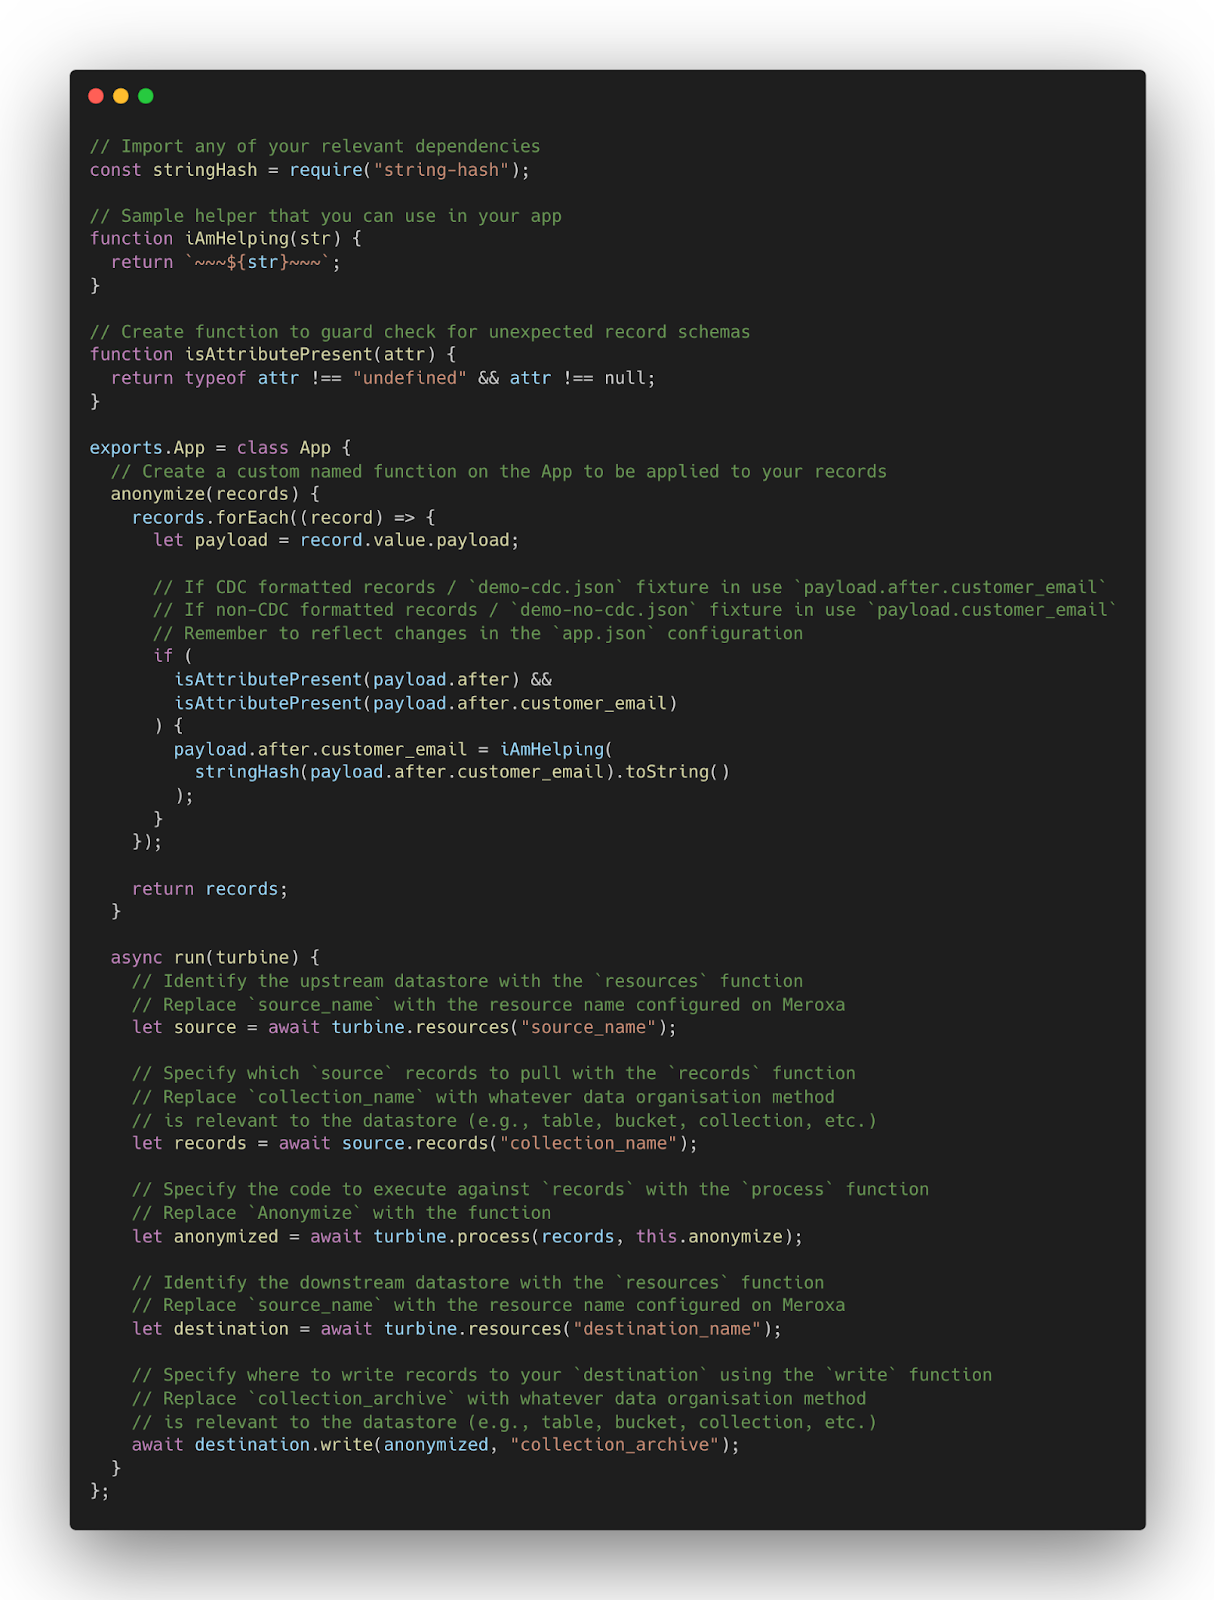
$ meroxa apps init myapp --lang jsYou may define a different local directory path for the app project by using --path /your/local/path/ in your command. A local app project directory will automatically be created on your local machine, complete with everything you need to build a streaming app. Open your Turbine project and look for the app.rb file. This is where you will be writing your Turbine streaming application code. It should already contain a basic boilerplate like below to get started.
In the next section, we will deploy the example app to our environment.
Deploying a Turbine streaming application in a Self Hosted Environment
Before deploying your application, ensure the resources used by your Turbine data app exist on the Meroxa Platform. You can check using the Meroxa Dashboard or CLI by running the meroxa resources list command --this command lists all resources and their state. If the resources don't exist, you must configure your resources using the Meroxa Dashboard.
The Turbine framework uses git for version control. Upon initializing your application, git init is performed locally on your behalf. This creates a new repository in the project folder of your Turbine data app, which can be used to track your code. You will need to commit your code changes before deploying.
Using the Meroxa CLI, run the meroxa app deploy command in the project folder root of your Turbine data app, this will start the process of deployment.
$ meroxa apps deploy --env my-envUsing the ‘env’ tag in the CLI allows you to indicate which environment to deploy your application, by default the application will be deployed to the Common Environment.
The Meroxa CLI will print out the steps taken and confirm once deployment is successful. You can view your newly deployed application in the dashboard or via the CLI. For a more detailed walkthrough of deploying a Turbine application to an environment, refer to our documentation.
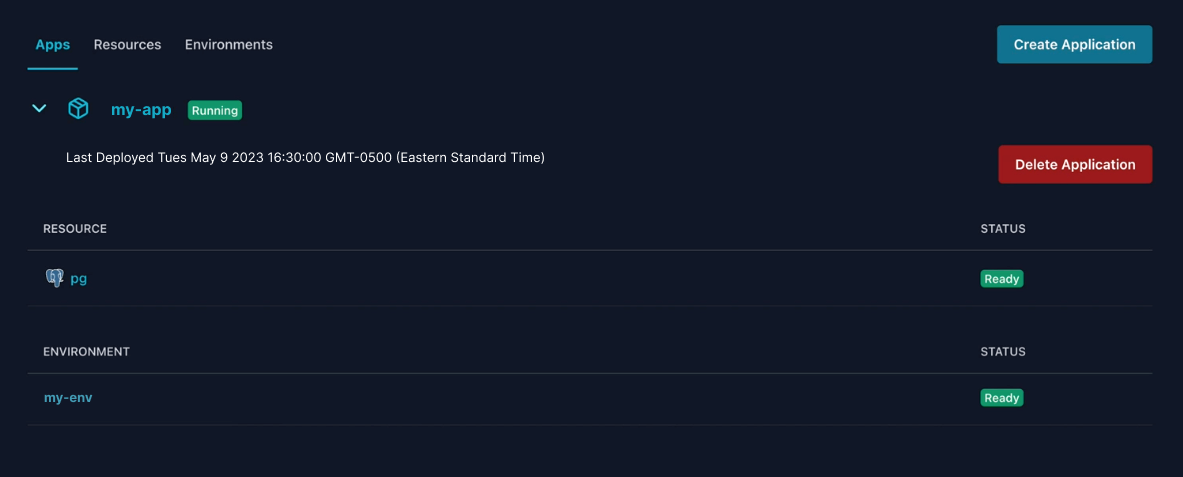
Viewing your newly created application
In the dashboard, you can view your newly created application in your environment under the Apps tab.
In the CLI, you can run the command below to list and view your applications.
$ meroxa app ls
UUID         NAME        LANGUAGE   GIT SHA   STATE   ENVIRONMENT
====== ================ ========== ========= ======= =============
8ed...     my-app       javascript   ad87... running    my-env
Have questions or feedback?
We love hearing from our customers! If you have questions or feedback, please feel free to contact us directly at support@meroxa.com or by joining our Discord community server. We're excited to see what you build 🚀