Data warehouses likeSnowflake allow you to collect and store data from multiple sources so that it can be accessed and analyzed. Real-time data warehousing is essential for e-commerce because it allows for up-to-the-minute analysis of customer behavior. In addition, the same data could be used to generate alerts about successful orders or potential fraud.
An approach often used to solve this problem is to use two entirely different tools: one tool to ingest into a data warehouse and another to make use of reverse ETL to perform alerting from data that's being activated within the data warehouse itself. However, this is difficult to maintain and can be a costly process.
Instead, you can use just Turbine to perform both real-time warehousing and alerting to Slack.
Here is what a Turbine Application looks like:
exports.App = class App {
    async run(turbine) {
        let source = await turbine.resources('pg')

        let records = await source.records('customerOrders')

        let data = await turbine.process(records, this.sendAlert)

        let destination = await turbine.resources('snowflake')

        await destination.write(data, 'customerOrders')
    }
}
This application usesJavaScript, but Turbine also hasPython,Go andRuby libraries.
Here is a quick overview of the steps we will take to get started:
- How it works?
- Setup
- Data Application Entrypoint
- Running
- Deployment
- What's next?
How it works?
A data application responds to events from your data infrastructure. You can learn more about the anatomy of a Javascript data application in thedocumentation.
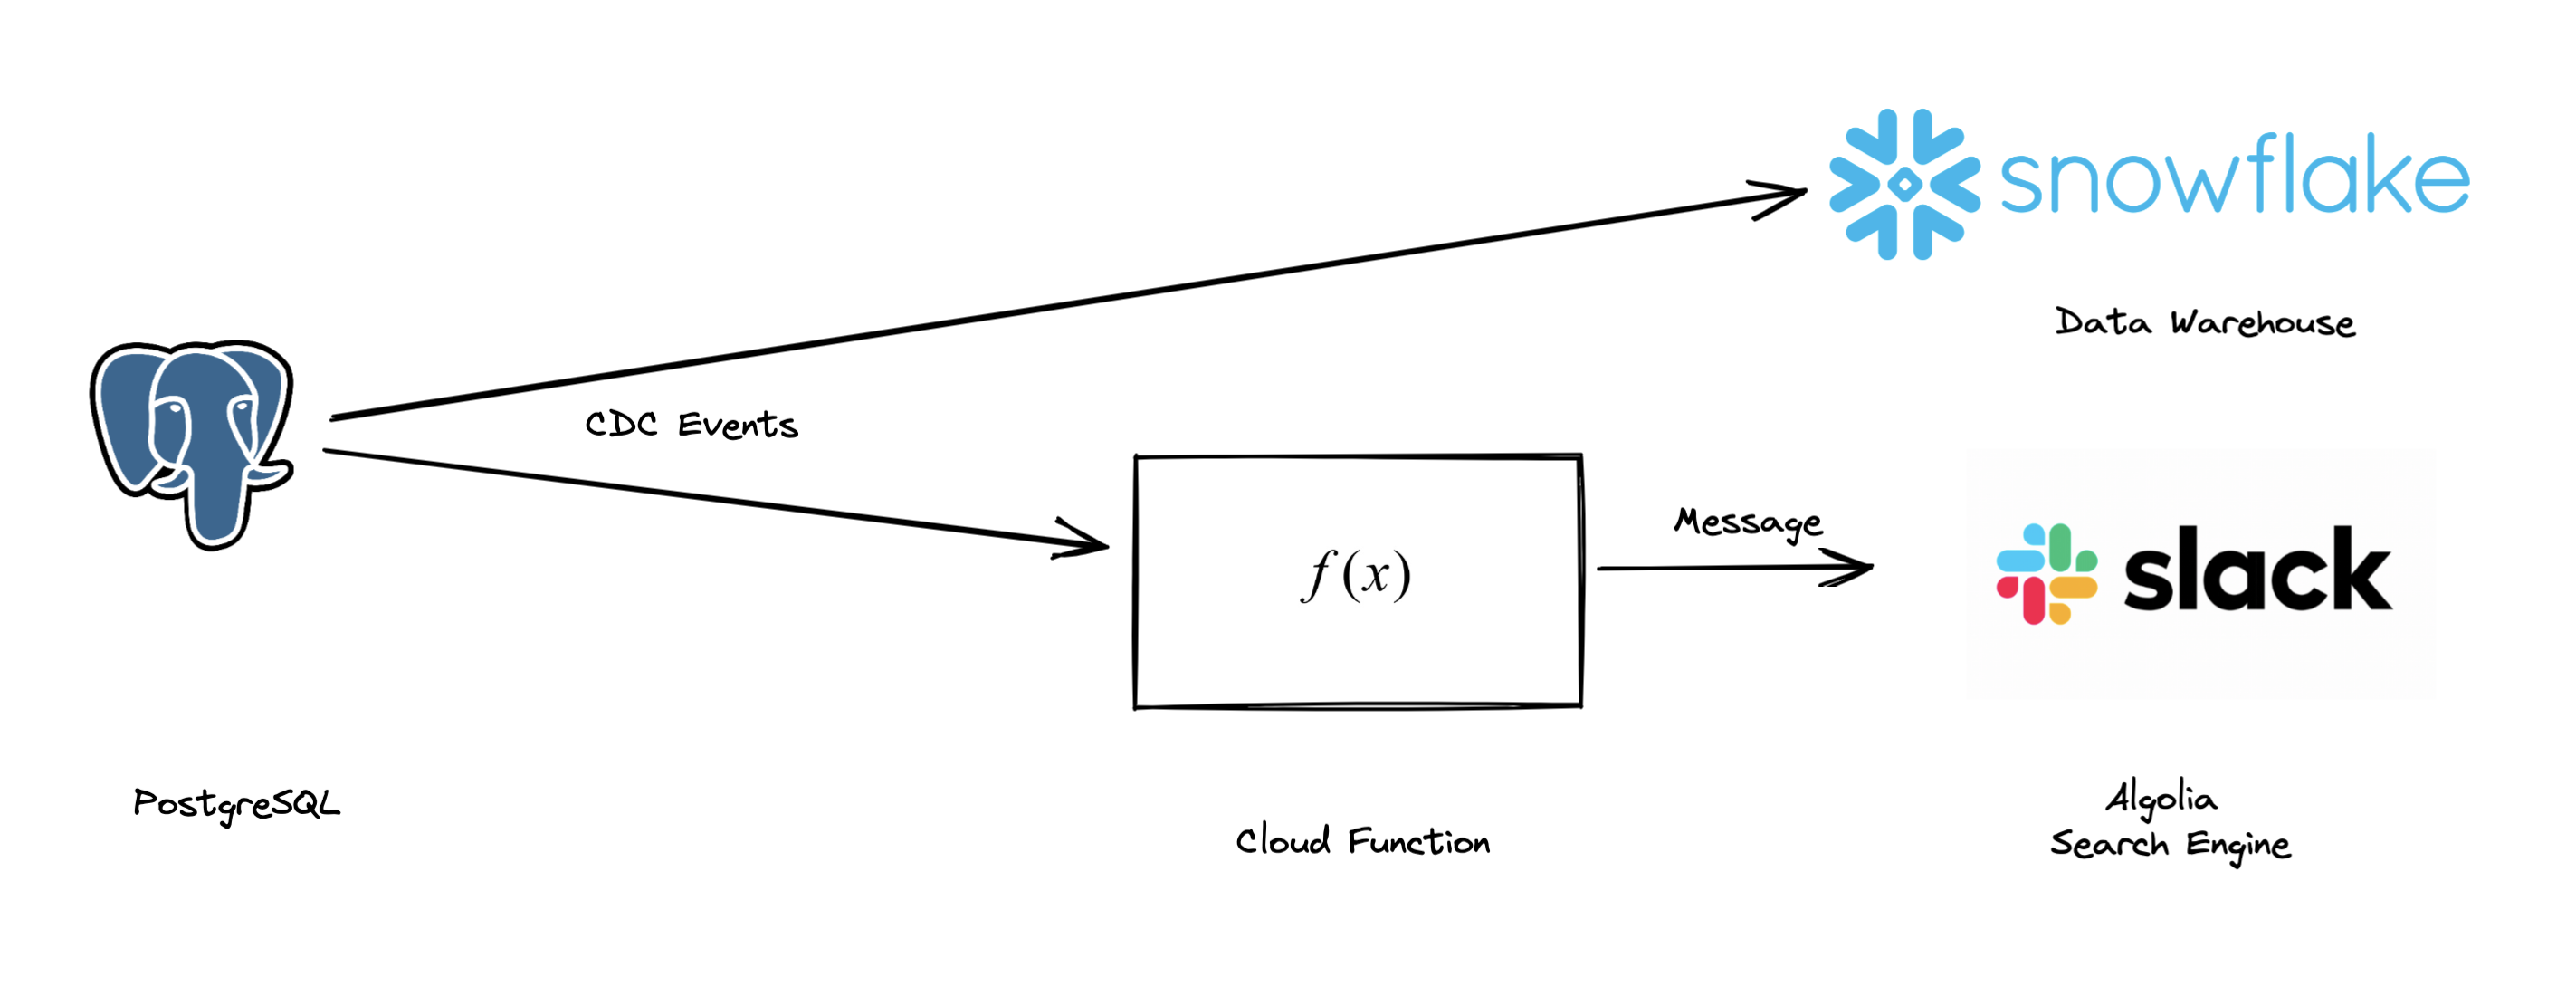
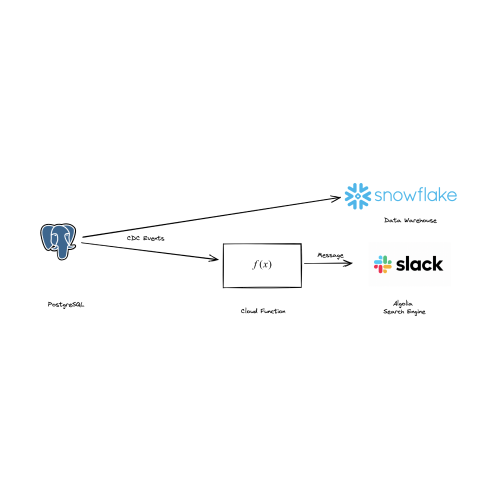
This data application will:
- Listen toCreate, Update, and Delete events from a Postgres database. This is where the orders are stored.
- Write the order data to Snowflake.
- Send an alert to Slack when an order is created.
Setup
Before we begin, you need to setup a few things:
$ meroxa login$ git clone git@github.com:meroxa/turbine-js-examples.gitSince this example uses Javascript, you will need to haveNode.js installed.
- Copy the
ecommerce-order-alertingdirectory to your local machine:
$ cp -r ~/turbine-js-examples/ecommerce-order-alerting ~/- Install NPM dependencies:
$ cd ecommerce-order-alerting
$ npm install
Now we are ready to build.
Data Application Entrypoint
const { sendSlackMessage } = require('./alert.js')

exports.App = class App {
    sendAlert(records) {
        records.forEach((record) => {
            let payload = record.value.payload
            sendSlackMessage(payload)
        })

        return records
    }

    async run(turbine) {
        let source = await turbine.resources('pg')

        let records = await source.records('customerOrders')

        let data = await turbine.process(records, this.sendAlert)

        let destination = await turbine.resources('snowflake')

        await destination.write(data, 'customerOrders')
    }
}
Running
Next, you may run your data application locally:
$ meroxa app runTurbine will usesfixtures to simulate your data infrastructure locally. This allows you to test without having to worry about the infrastructure. Fixtures are JSON-formatted data records you can develop against locally. To customize the fixtures for your application, you can find them in thefixtures directory.
Deployment
After you test the behavior locally, you can deploy it to Meroxa.
Meroxa is the data platform to run and execute your Turbine apps. Meroxa takes care of maintaining the connection to your database and executing your application as changes. All you need to worry about is the data application itself.
Here is how you deploy:
- Add a PostgreSQL resource to your Meroxa environment:
$ meroxa resource create postgresql \
--type postgres \
--url postgres://$PG_USER:$PG_PASS@$PG_URL:$PG_PORT/$PG_DB- Add a Snowflake data warehouse resource to your Meroxa environment:
$ meroxa resource create snowflake \
--type snowflakedb \
--url "snowflake://$SNOWFLAKE_URL/meroxa_db/stream_data" \
--username meroxa_user \
--password "$SNOWFLAKE_PRIVATE_KEY"- Deploy to Meroxa:
$ meroxa app deployNow, as changes are made to the upstream data infrastructure, your data application will be executed.
What's next?
That's it! Your data application is now running. You can now verify the data in your Data Warehouse.
We can't wait to see what you build 🚀.
If you have any questions or feedback:Join the Community


